J...S

I was trying to use aobs-tikz package to create overlays in beamer for
a tikzpicture.
This is what I have been trying:
with this latex snippet.
```tex
\documentclass{beamer}
\usepackage{tikz}
\usetikzlibrary{automata}
\usetikzlibrary{positioning}
\usetikzlibrary{overlay-beamer-styles}
\begin{document}
\begin{frame}{Hi}
\begin{tikzpicture}[
block/.style = {
draw,
shape=rectangle,
minimum height=1.2cm,
fill=gray!20
},
]
\node[visible on=<1->] (input) {Input};
\node[visible on=<2->] (block)[
right of=input,
label=above:{Process},
visible on=<2->,
block,
xshift=15mm
] {Block};
\draw[->, visible on=<2->] (input) -- (block);
\end{tikzpicture}
\end{frame}
\end{document}
```
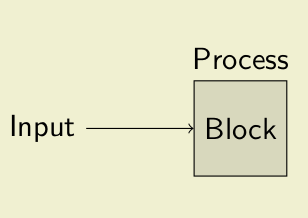
I wanted two slides.
The 'Block' node along with its label 'Process' should be visible only in the second slide.
But I can't get the 'Process' label to be hidden.
How can this be done?
Perhaps this is not possible when using `label=above:{Process}` attribute of `\node`?
Top Answer
Skillmon

You can give options to the node using the syntax `label=[<options>]<position>:<contents>`. Note that you need to put `{}` around the entire `label`-value in order to hide the `]` from the parser searching for the end of the optional argument of `\node`.
Inside these `<options>` you're free to restate `visible on`.
I also moved the entire options list into a single optional argument, but this is not strictly necessary, the syntax would also work if you sticked to your `(<name>)[<further options>]` syntax.
```
\documentclass{beamer}
\usepackage{tikz}
\usetikzlibrary{automata}
\usetikzlibrary{positioning}
\usetikzlibrary{overlay-beamer-styles}
\begin{document}
\begin{frame}{Hi}
\begin{tikzpicture}[
block/.style = {
draw,
shape=rectangle,
minimum height=1.2cm,
fill=gray!20
},
]
\node[visible on=<1->] (input) {Input};
\node[visible on=<2->,
right of=input,
label={[visible on=<2->]above:{Process}},
block,
xshift=15mm
] (block) {Block};
\draw[->, visible on=<2->] (input) -- (block);
\end{tikzpicture}
\end{frame}
\end{document}
```
Answer #2
samcarter

Quick hack: change the text opacity on the first overlay:
```
\documentclass{beamer}
\usepackage{tikz}
\usetikzlibrary{automata}
\usetikzlibrary{positioning}
\usetikzlibrary{overlay-beamer-styles}
\begin{document}
\begin{frame}
\frametitle{Hi}
\begin{tikzpicture}[
block/.style = {
draw,
shape=rectangle,
minimum height=1.2cm,
fill=gray!20
},
]
\node[visible on=<1->] (input) {Input};
\node[visible on=<2->] (block)[
right of=input,
label=above:{{\only<1>{\pgfsetfillopacity{0}}Process}},
block,
xshift=15mm
] {Block};
\draw[->, visible on=<2->] (input) -- (block);
\end{tikzpicture}
\end{frame}
\end{document}
```
Answer #3
samcarter
Another quick hack: use `alt=<2>{label=above:{Process}}` to only add the label to the second overlay and use an invisible rectangle to avoid jumping of the image.
```
\documentclass{beamer}
\usepackage{tikz}
\usetikzlibrary{automata}
\usetikzlibrary{positioning}
\usetikzlibrary{overlay-beamer-styles}
\begin{document}
\begin{frame}
\frametitle{Hi}
\begin{tikzpicture}[
block/.style = {
draw,
shape=rectangle,
minimum height=1.2cm,
fill=gray!20
},
]
\path (-1,-1) rectangle (4,1.5);
\node[visible on=<1->] (input) {Input};
\node[visible on=<2->] (block)[
right of=input,
alt=<2>{label=above:{Process}},
block,
xshift=15mm
] {Block};
\draw[->, visible on=<2->] (input) -- (block);
\end{tikzpicture}
\end{frame}
\end{document}
```