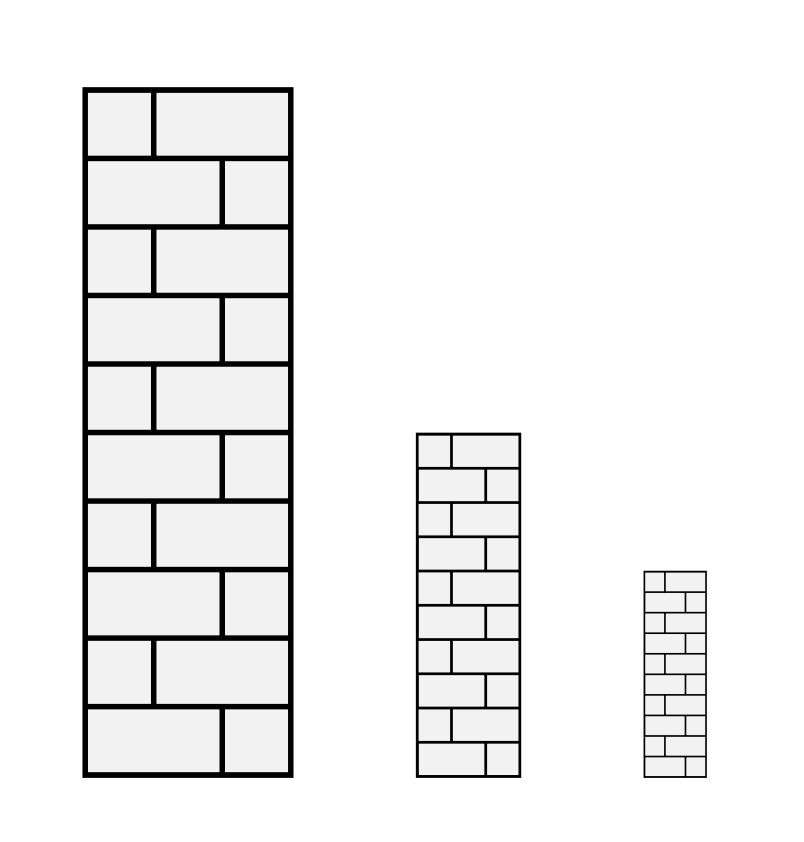
Patterns are tricky. They "directly" talk to the driver so they do not get affected by `\scalebox` and company. This is what makes them so fast. You can engineer patterns that scale with the unit lengths or scales in a `tikzpicture`, but if you scale things from outside it is much harder to achieve that.
An alternative is the `path picture`. True, it is slower to compile, but it does not suffer from the above limitations. For the brick here you could use something like
```
\documentclass{article}
\usepackage{tikz,adjustbox}
%\usetikzlibrary{3d,arrows.meta,bending,calc,decorations.markings,patterns, patterns.meta,positioning,shapes.geometric}
\usetikzlibrary{calc}
\makeatletter
\tikzset{brick fill/.style={path picture={%
\tikzset{brick fill keys/.cd,#1}%
\edef\pgfutil@tmpp{path picture bounding box}
\edef\pgfutil@tmpw{\pgfkeysvalueof{/tikz/brick fill keys/width}}
\edef\pgfutil@tmph{\pgfkeysvalueof{/tikz/brick fill keys/height}}
\path[brick fill keys/style] let \p1=($(\pgfutil@tmpp.north east)-(\pgfutil@tmpp.south west)$),
\n1={scalar(int(\x1/\pgfutil@tmpw))},
\n2={scalar(int(\y1/\pgfutil@tmph))+1} in
foreach \YY in {0,...,\n2}
{([yshift=(\YY-0.5)*\pgfutil@tmph]\pgfutil@tmpp.south west) -- ([yshift=(\YY-0.5)*\pgfutil@tmph]\pgfutil@tmpp.south east)
([yshift=\YY*\pgfutil@tmph]\pgfutil@tmpp.south west) -- ([yshift=\YY*\pgfutil@tmph]\pgfutil@tmpp.south east)
foreach \XX in {0,...,\n1} {
([yshift=(\YY-0.5)*\pgfutil@tmph,xshift=(\XX-0.5)*\pgfutil@tmpw]\pgfutil@tmpp.south west)
--([yshift=\YY*\pgfutil@tmph,xshift=(\XX-0.5)*\pgfutil@tmpw]\pgfutil@tmpp.south west)
([yshift=(\YY+0.5)*\pgfutil@tmph,xshift=\XX*\pgfutil@tmpw]\pgfutil@tmpp.south west)
--([yshift=\YY*\pgfutil@tmph,xshift=\XX*\pgfutil@tmpw]\pgfutil@tmpp.south west)
}};}},
brick fill keys/.cd,width/.initial=1em,height/.initial=1em,style/.style={draw}}
\makeatother
\begin{document}
\begin{adjustbox}{width=0.05\linewidth}
\begin{tikzpicture}[x = 3em, y = 3em]
\node at (0,4) [draw, rectangle, minimum height=5em, minimum width = 1.5em,
anchor=west, preaction = {fill=gray!10},brick fill](bricks1) {};
\end{tikzpicture}
\end{adjustbox}%
\quad
\begin{adjustbox}{width=0.025\linewidth}
\begin{tikzpicture}[x = 3em, y = 3em]
\node at (0,2) [draw, rectangle, minimum height=5em, minimum width = 1.5em,
anchor=west, preaction = {fill=gray!10},brick fill](bricks2) {};
\end{tikzpicture}
\end{adjustbox}%
\quad
\begin{adjustbox}{width=0.015\linewidth}
\begin{tikzpicture}[x = 3em, y = 3em]
\node at (0,0) [draw, rectangle, minimum height=5em, minimum width = 1.5em,
anchor=west, preaction = {fill=gray!10},brick fill](bricks3) {};
\end{tikzpicture}
\end{adjustbox}
\end{document}
```

Notice that you can control the width, the height and the style of the pattern. Style means line color, line width, dashes, the usual things. You can try e.g.
```
brick fill={height=1.5em,width=0.6em,style/.style={draw=red}}
```
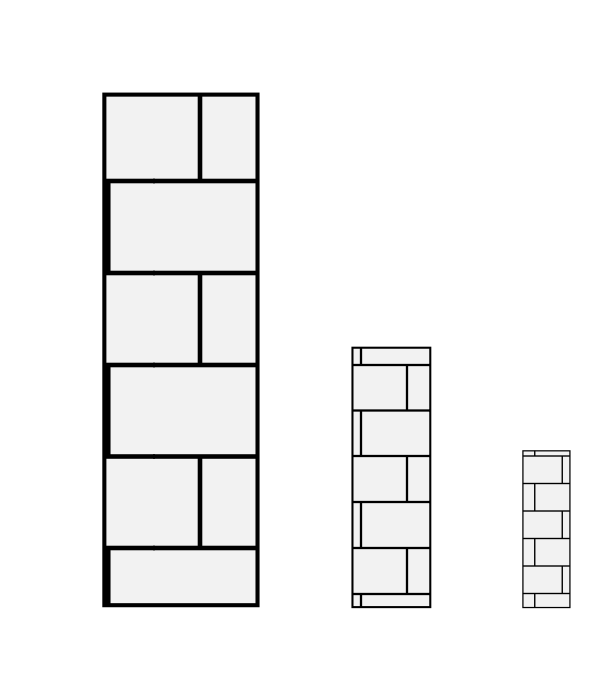
An alternative is to resort to `patterns.meta`. Then you can control the parameters width, height and line width (and if you add more options, these as well). But you have to dial the scale factor by hand. In the example you gave this is easy, but in examples in which you use `adjustbox` to trim the graphics to a certain width more delicate.
```
\documentclass{article}
\usepackage{tikz,adjustbox}
\usetikzlibrary{patterns.meta}
\pgfdeclarepattern{name=Bricks,
parameters={\brickwidth,\brickheight,\brickangle,\bricklinewidth},
bottom left={\pgfpoint{-.1pt}{-.1pt}},
top right={\pgfpoint{\brickwidth+.1pt}{\brickheight+.1pt}},
tile size={\pgfpoint{\brickwidth}{\brickheight}},
tile transformation={\pgftransformrotate{\brickangle}},
code={
\pgfsetlinewidth{\bricklinewidth}
\pgfpathmoveto{\pgfpoint{-.1pt}{0pt}}
\pgfpathlineto{\pgfpoint{\brickwidth+.1pt}{0pt}}
\pgfpathmoveto{\pgfpoint{-.1pt}{0.5*\brickheight}}
\pgfpathlineto{\pgfpoint{\brickwidth+.1pt}{0.5*\brickheight}}
\pgfpathmoveto{\pgfpoint{0.25*\brickwidth}{0pt}}
\pgfpathlineto{\pgfpoint{0.25*\brickwidth}{0.5*\brickheight}}
\pgfpathmoveto{\pgfpoint{0.75*\brickwidth}{0.5*\brickheight}}
\pgfpathlineto{\pgfpoint{0.75*\brickwidth}{\brickheight}}
\pgfusepath{stroke}
} }
\tikzset{/pgf/pattern keys/.cd,
brick width/.store in=\brickwidth,
brick height/.store in=\brickheight,
brick angle/.store in=\brickangle,
brick line width/.store in=\bricklinewidth,
brick width=1em,
brick height=1em,
brick angle=0pt,
brick line width=.5pt,
}
\begin{document}
\begin{adjustbox}{width=0.05\linewidth}
\begin{tikzpicture}[x = 3em, y = 3em]
\node at (0,4) [draw, rectangle, minimum height=5em, minimum width = 1.5em,
anchor=west, preaction = {fill=gray!10},
pattern={Bricks[brick width=2em,brick height=2em]}](bricks1) {};
\end{tikzpicture}
\end{adjustbox}%
\quad
\begin{adjustbox}{width=0.025\linewidth}
\begin{tikzpicture}[x = 3em, y = 3em]
\node at (0,2) [draw, rectangle, minimum height=5em, minimum width = 1.5em,
anchor=west, preaction = {fill=gray!10},
pattern={Bricks[brick width=1em,brick height=1em,brick line width=.25pt]}](bricks2) {};
\end{tikzpicture}
\end{adjustbox}%
\quad
\begin{adjustbox}{width=0.015\linewidth}
\begin{tikzpicture}[x = 3em, y = 3em]
\node at (0,0) [transform shape,draw, rectangle, minimum height=5em, minimum width = 1.5em,
anchor=west, preaction = {fill=gray!10},
pattern={Bricks[brick width=0.6em,brick height=0.6em,brick line width=.15pt]}](bricks3) {};
\end{tikzpicture}
\end{adjustbox}
\end{document}
```

Note that one can synchronize the patterns by dialing appropriate shifts, see [here](https://tex.stackexchange.com/a/545846), but only reliably within one `tikzpicture`. Making this work across `tikzpicture`s is harder, and notice that conversions to other formats like `gif` can shift the pattern around in a way that is hard to control.